Quickstart for Estuary
In this tutorial, you will learn how to set up a streaming Change Data Capture (CDC) pipeline from PostgreSQL to Snowflake using Estuary.
Before you get started, make sure you do two things.
-
Sign up for Estuary here. It’s simple, fast and free.
-
Make sure you also join the Estuary Slack Community. Don’t struggle. Just ask a question.
When you register, your account will use Estuary's secure cloud storage bucket to store your data. Data in Estuary's cloud storage bucket is deleted 20 days after collection.
For production use cases, you should configure your own cloud storage bucket.
Step 1. Set up a Capture
Head over to the Estuary dashboard (if you haven’t registered yet, you can do so here) and create a new Capture. A capture is how Estuary ingests data from an external source.
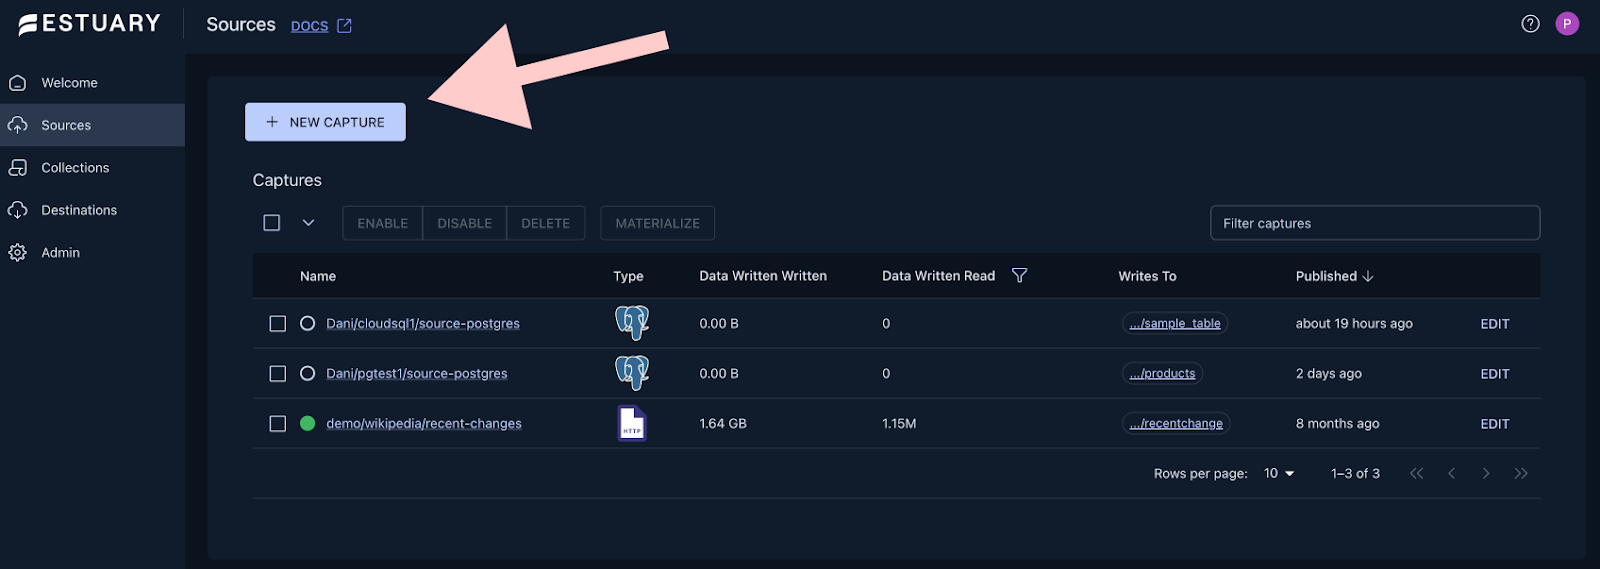
Go to the sources page by clicking on the Sources on the left hand side of your screen, then click on + New Capture
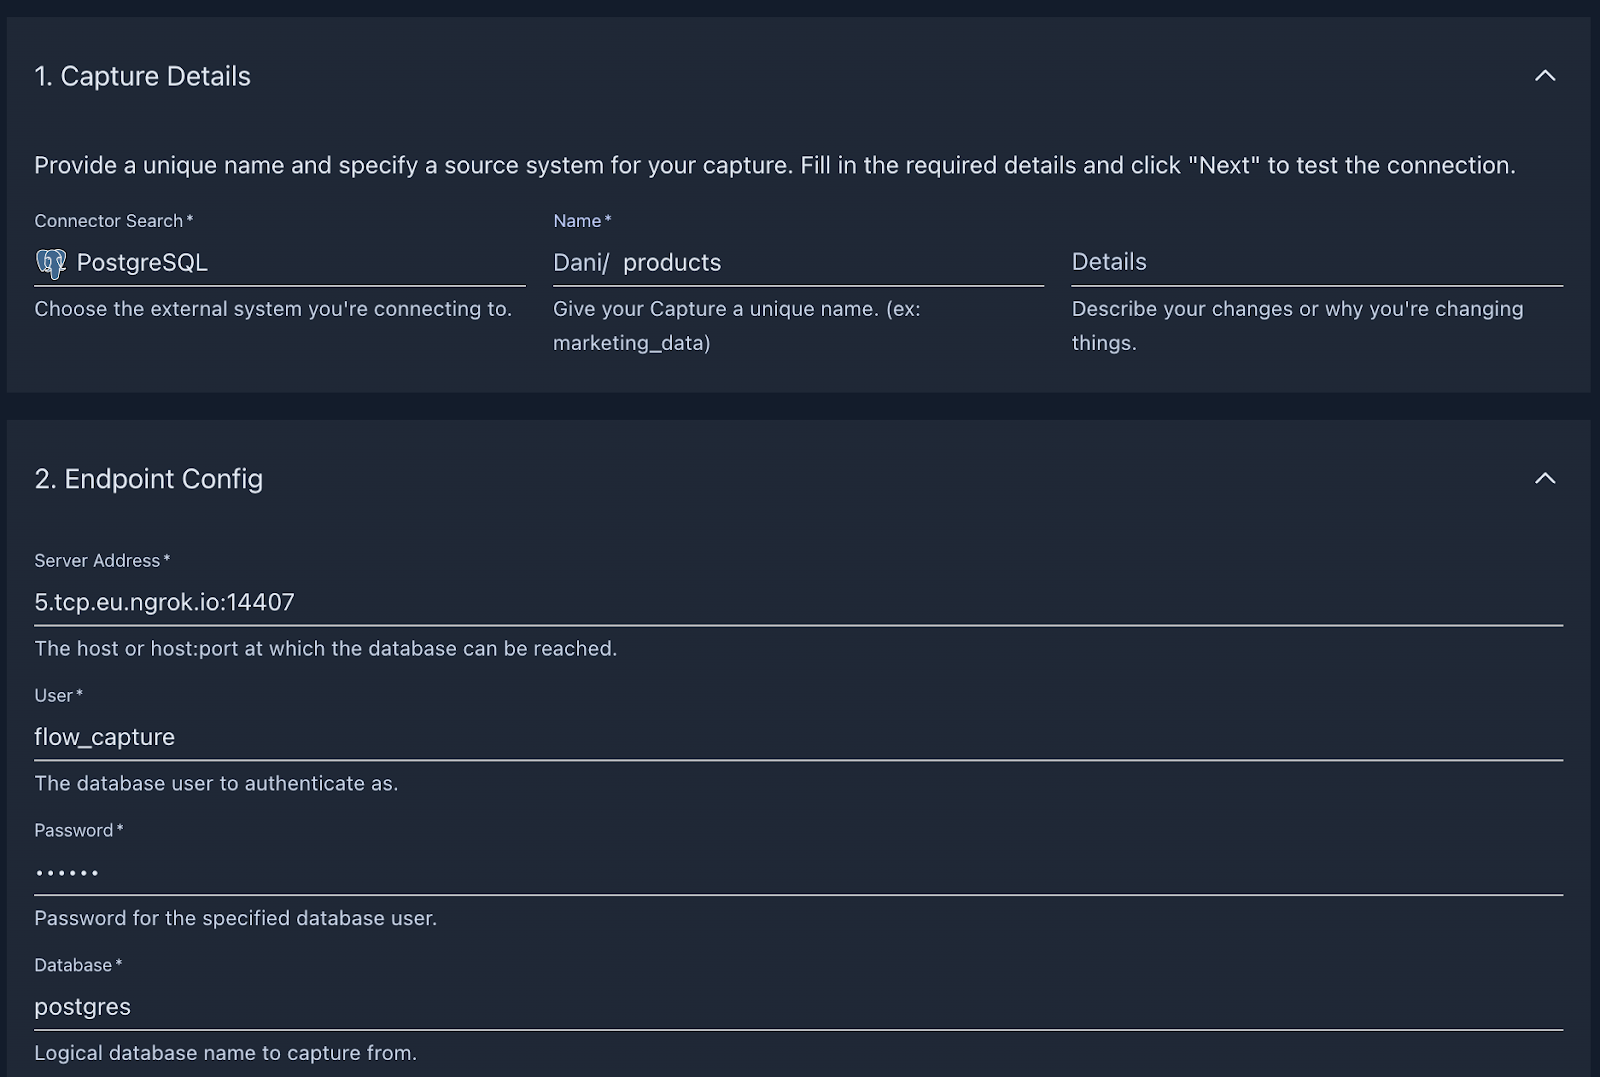
Configure the connection to the database and press Next.
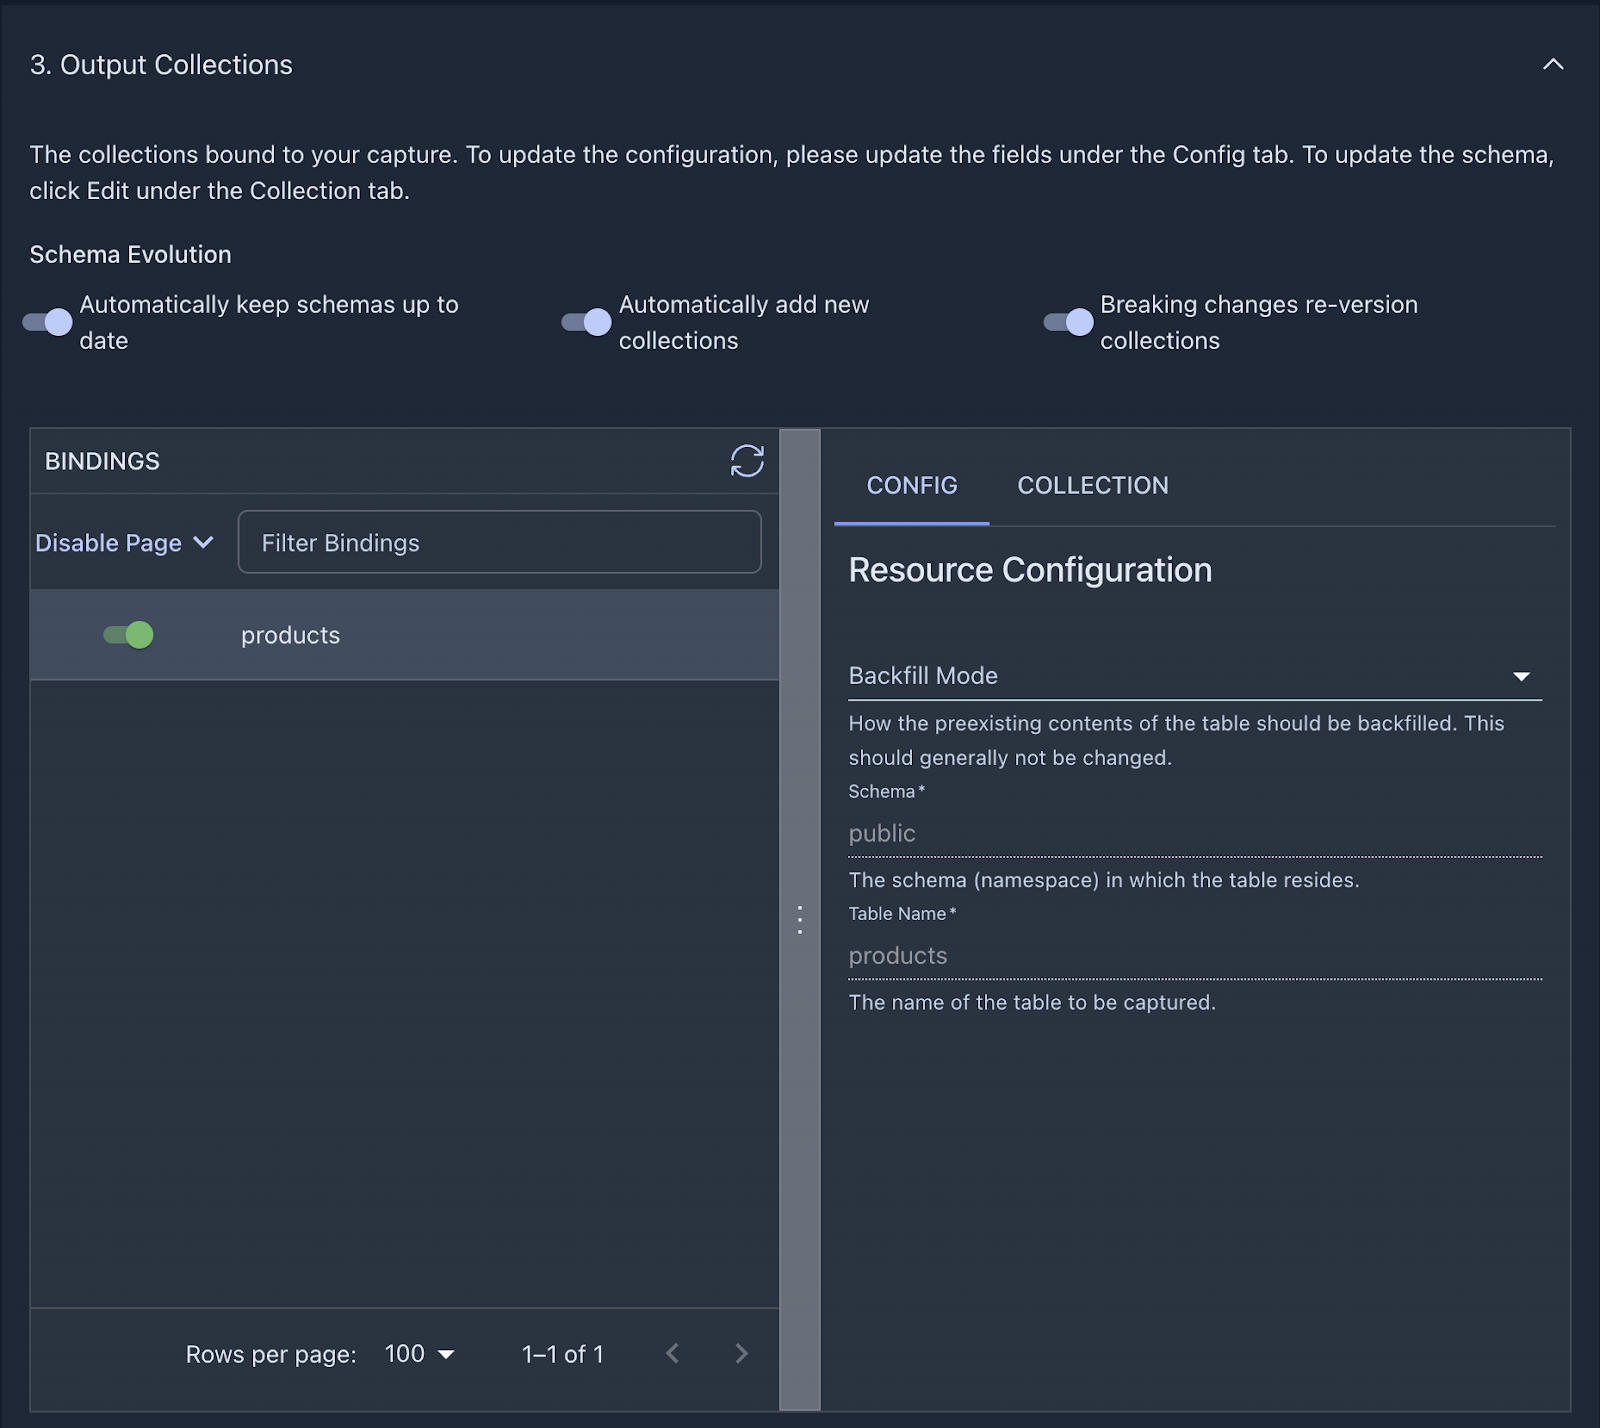
On the following page, we can configure how our incoming data should be represented in Estuary as collections. As a quick refresher, let’s recap how Estuary represents data on a high level.
Documents
The documents of your data flows are stored in collections: real-time data lakes of JSON documents in cloud storage. Documents being backed by an object storage mean that once you start capturing data, you won’t have to worry about it not being available to replay – object stores such as S3 can be configured to cheaply store data forever. See docs page for more information.
Schemas
Estuary's documents and collections always have an associated schema that defines the structure, representation, and constraints of your documents. In most cases, Estuary generates a functioning schema on your behalf during the discovery phase of capture, which has already automatically happened - that’s why you’re able to take a peek into the structure of the incoming data!
To see how Estuary parsed the incoming records, click on the Collection tab and verify the inferred schema looks correct.
Step 2. Set up a Materialization
Similarly to the source side, we’ll need to set up some initial configuration in Snowflake to allow Estuary to materialize collections into a table.
Head over to the Destinations page, where you can create a new Materialization.

Choose Snowflake and start filling out the connection details based on the values inside the script you executed in the previous step. If you haven’t changed anything, this is how the connector configuration should look like:
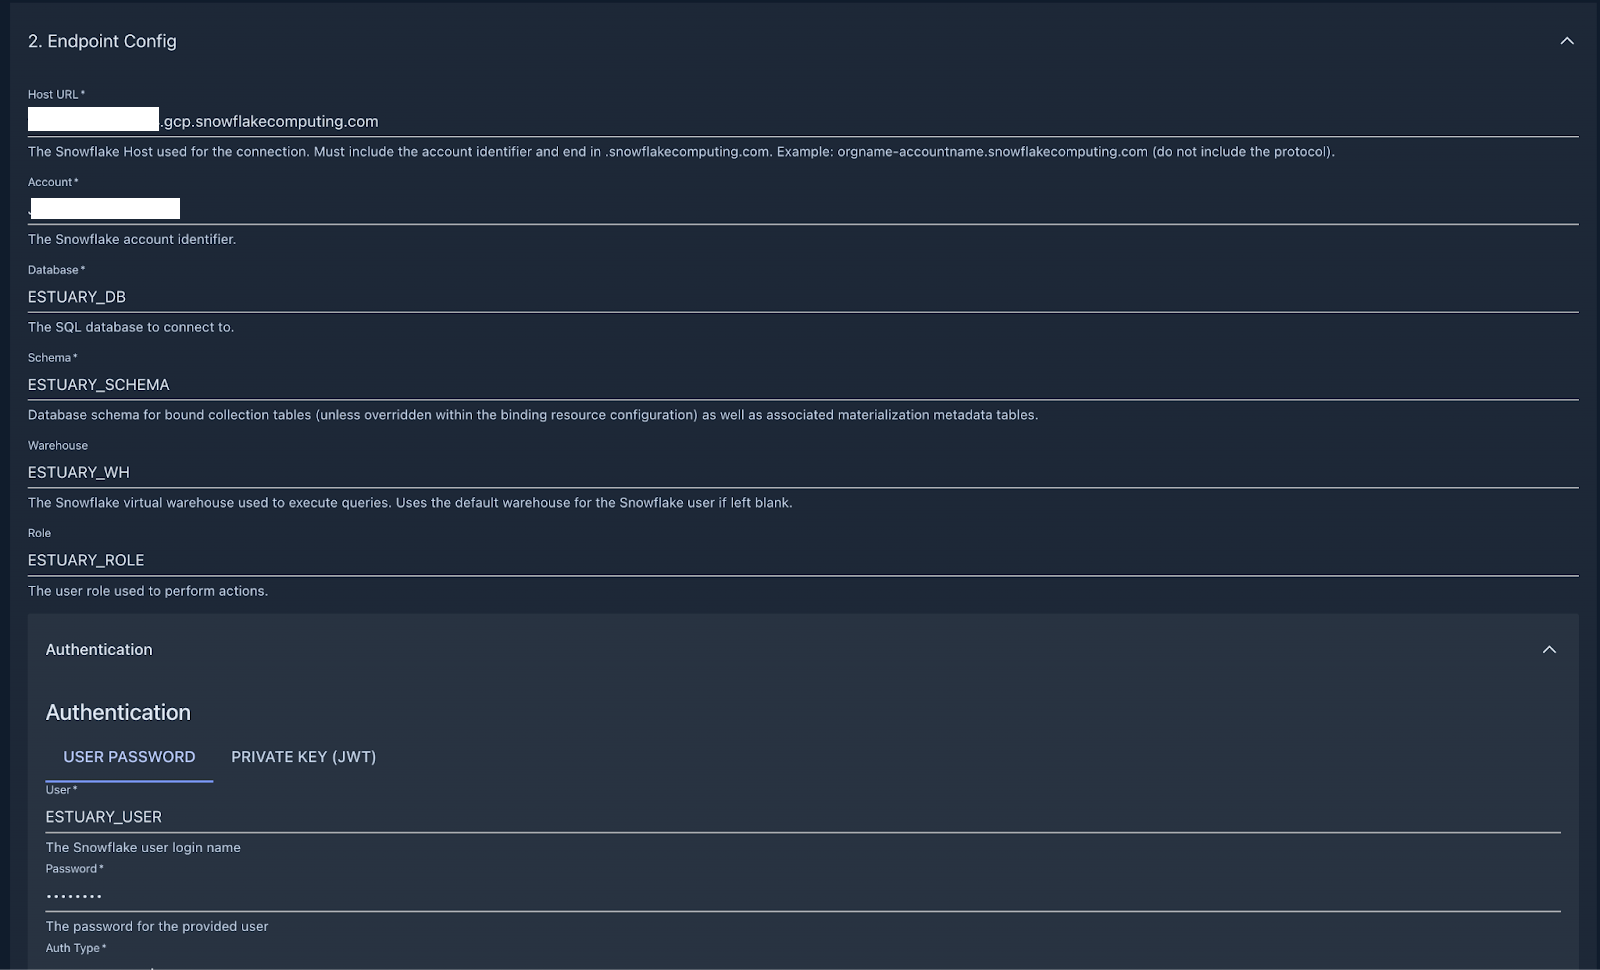
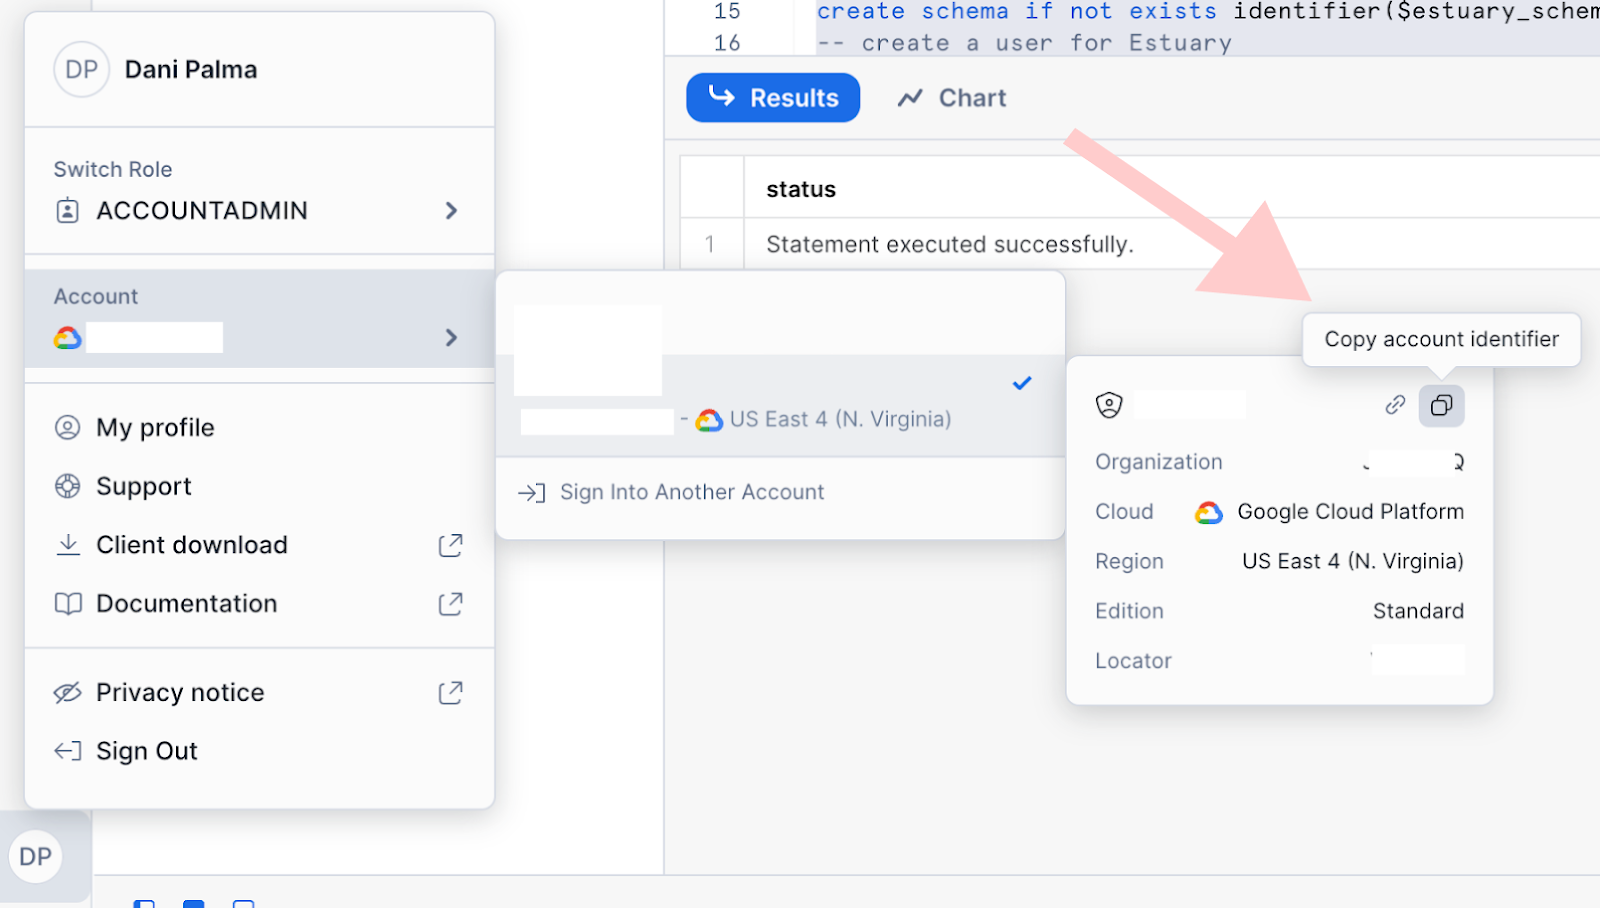
You can grab your Snowflake host URL and account identifier by navigating to these two little buttons on the Snowflake UI.
After the connection details are in place, the next step is to link the capture we just created so Estuary is able to see collections we are loading data into from Postgres.
You can achieve this by clicking on the “Source from Capture” button, and selecting the name of the capture from the table.
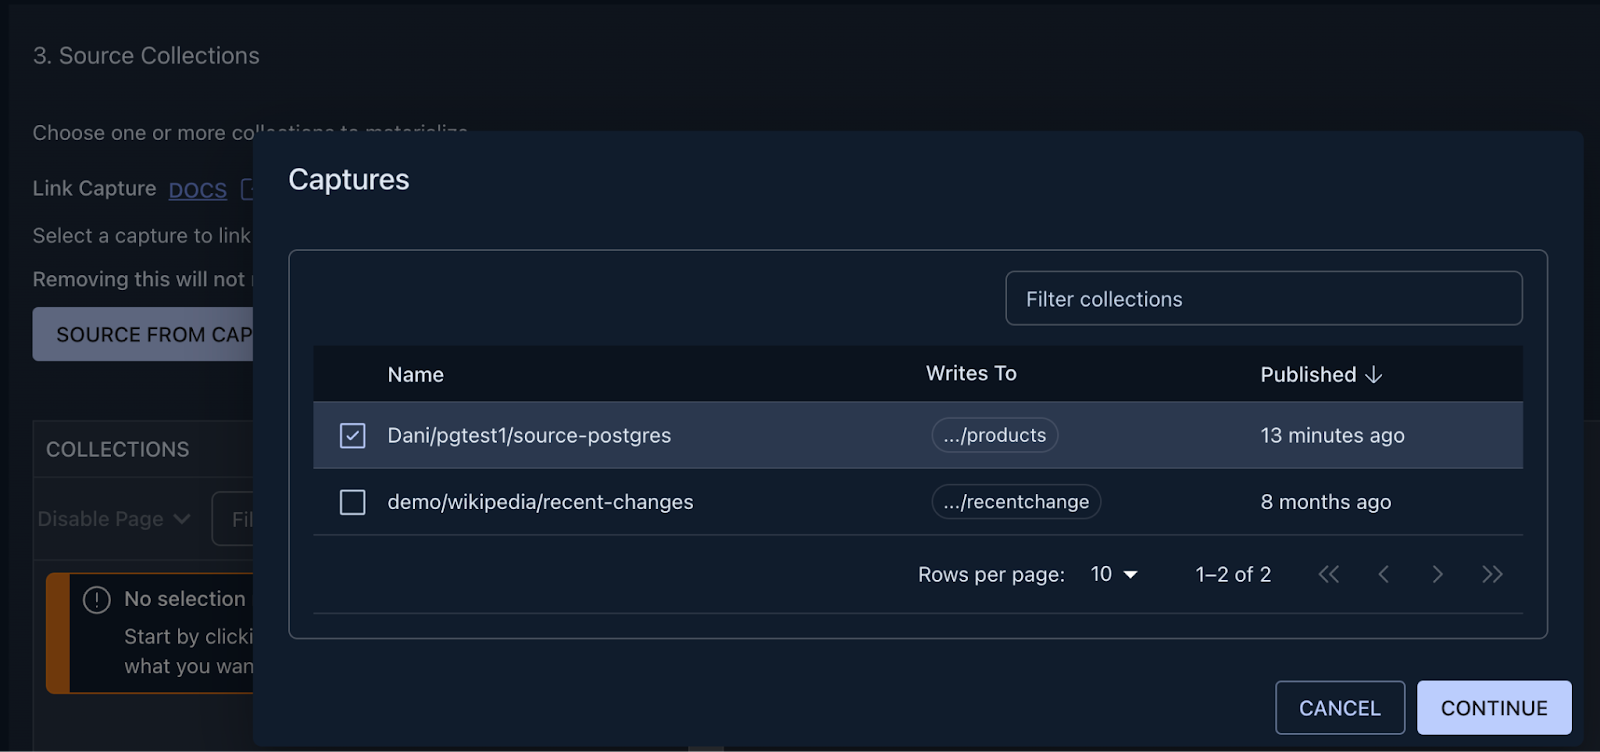
After pressing continue, you are met with a few configuration options, but for now, feel free to press Next, then Save and Publish in the top right corner, the defaults will work perfectly fine for this tutorial.
A successful deployment will look something like this:
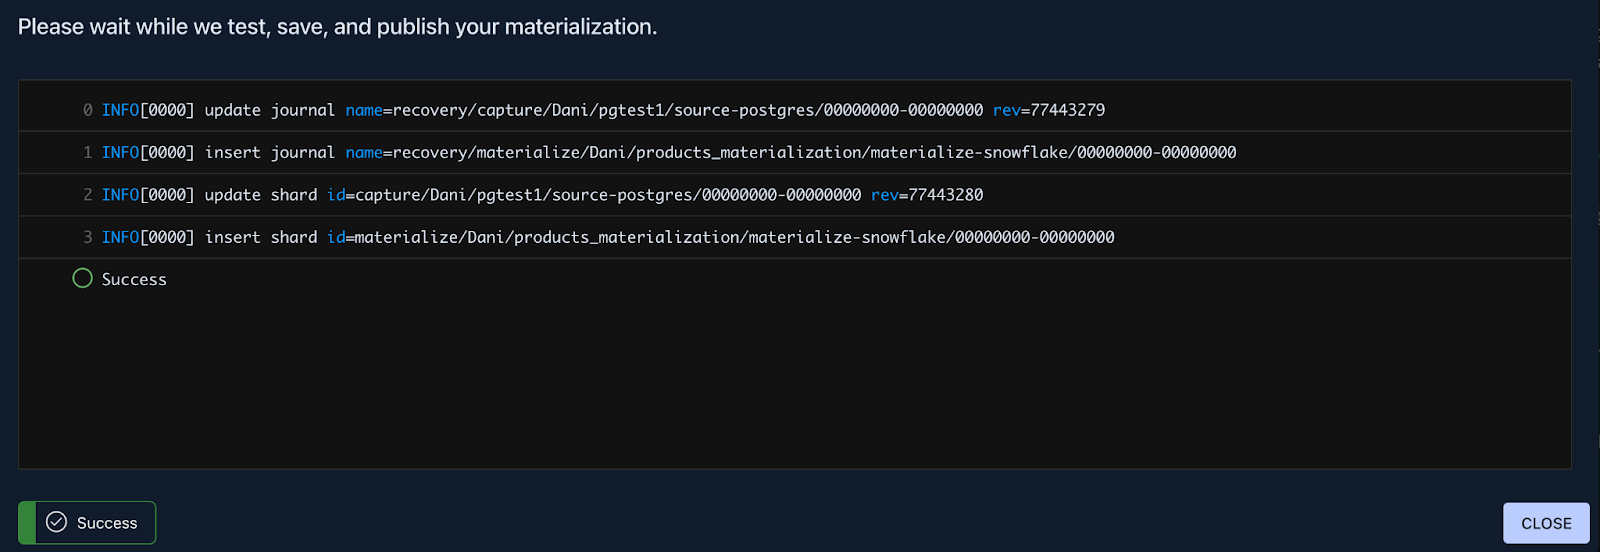
And that’s it, you’ve successfully published a real-time CDC pipeline. Let’s check out Snowflake to see how the data looks.
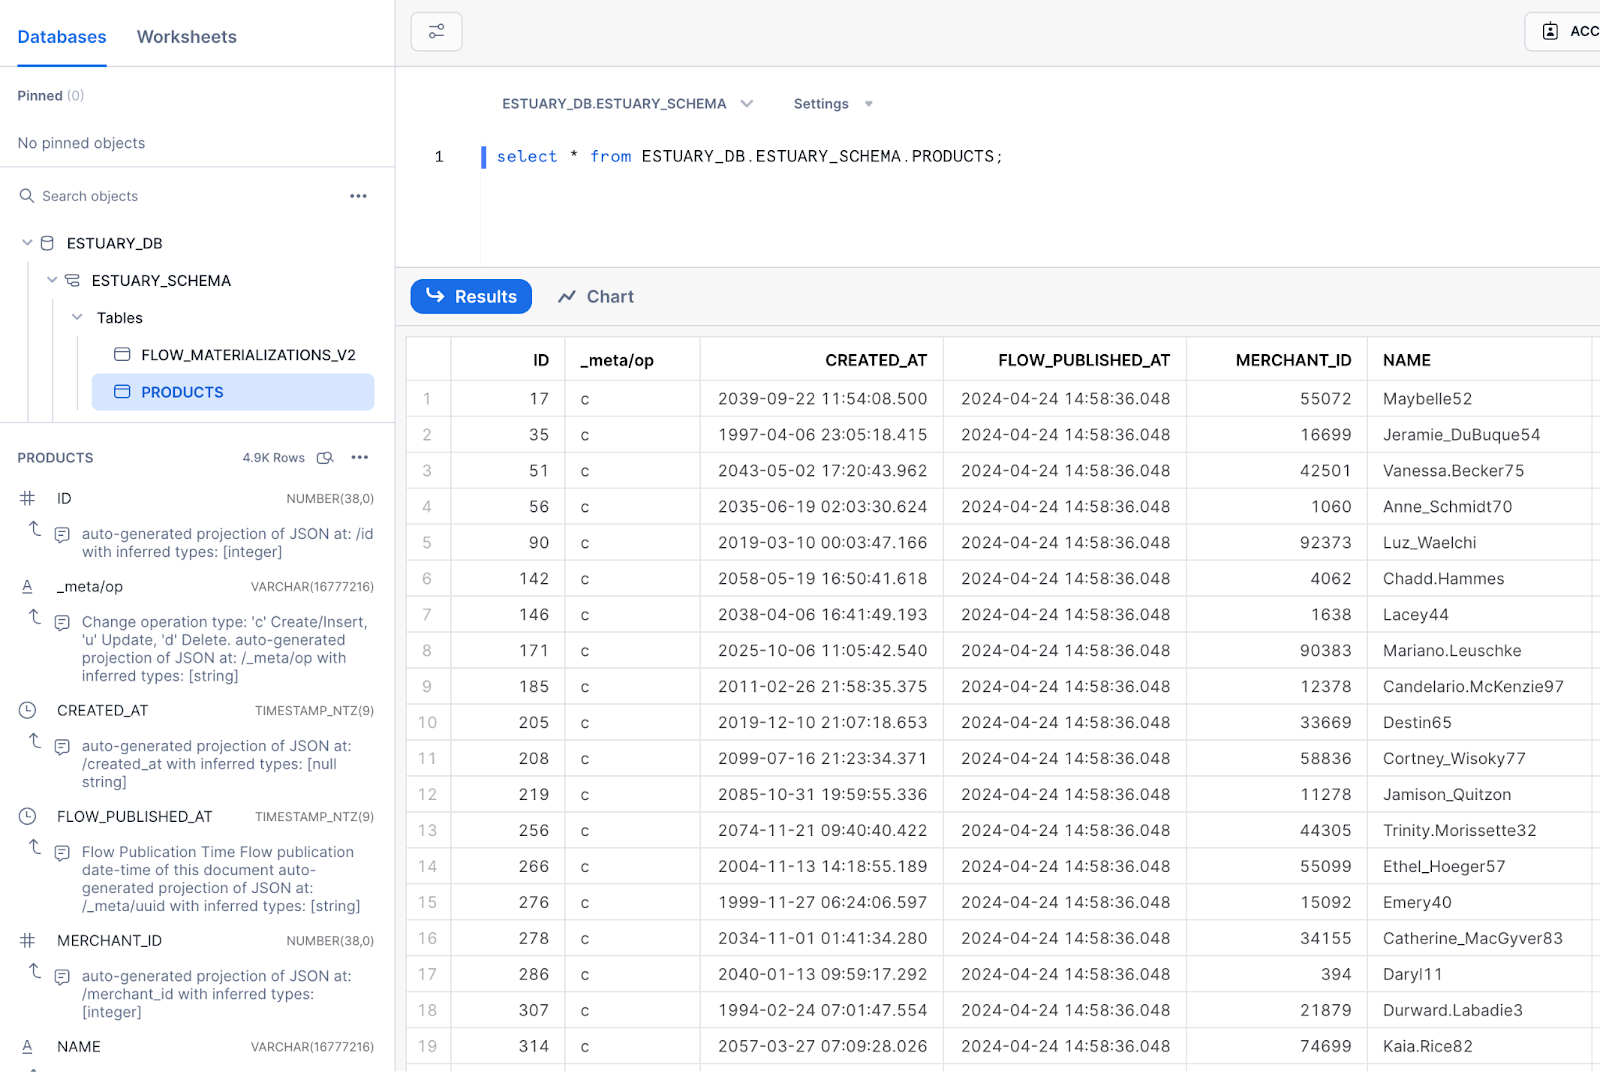
Looks like the data is arriving as expected, and the schema of the table is properly configured by the connector based on the types of the original table in Postgres.
To get a feel for how the data flow works, head over to the collection details page on the web UI to see your changes immediately. On the Snowflake end, they will be materialized after the next update.
Next Steps
That’s it! You should have everything you need to know to create your own data pipeline for loading data into Snowflake!
Now try it out on your own PostgreSQL database or other sources.
If you want to learn more, make sure you read through the Estuary documentation.
You’ll find instructions on how to use other connectors here. There are more tutorials here.
Also, don’t forget to join the Estuary Slack Community!